Monday

St. Patrick's Day is ah Coming.......


My son reminded me when he got home from school today that St. Patrick's Day is this week and he needs something green to where to school. Well he actually told me I HAD to make him something Green to wear to school. My son is the type of boy that will not come close to something that might remotely look like it's made for a girl, so I was a little stomped as to what I could make for him. I took to the net to do some searching around for some fun crafts of St. Patty's day. I came across these few crafts that I really liked, but my heart is telling me I will be making these for my nieces and not my son. I love those t-shirts that say "kiss me I'm Irish" maybe I can make him on of those. Or an over sized neck tie with some felt shamrocks attached to it. Who knows what I'll come up with. Check back in with me in a couple of days. I'm pretty sure I'll come up with something cool for him to sport to school. If you like any of the crafts above check the links below for how-to tutorials. 


Images courtesy of : Tiny Prints, Sunshine Creations, Martha Stewart, Craft Foxes, All Things Cupcakes

Friday

Little Miss Piggy... Take 1.


I'm meeting with a client today that apparently loves Little Miss Piggy. Um okay, if you like it I'll design around it. This is presentation board #1 Little Miss Piggy style. Because this bedroom is not for a small child or teenager for that matter I thought I'd keep it simple and clean with a color palate that only consisted of three colors, pink, black,and white. For me black and white always evokes a sense of sophistication in a space. The pink goes without saying, I mean it's Little Miss Piggy. I added a few silver pieces in the mix for extra flare. I don't know about you but when I think of Miss Piggy I think High Glam. So I wanted to give the room a glamorous feeling while keeping it simple at the same time. Less is more. One nice size photo of Miss Piggy herself over the bed is an easy way to show case the love for her favorite childhood character. Crossing my fingers on this one.

Tuesday

I Love to make Pretty things, Now you can too... Felt pillow Tutorial


So I made the pretty little pillow last night that I will have for sale in my Etsy shop soon enough. I thought It would be a good idea to show you all how to make one as well. Don't worry if your not the DIY type but you like to pillow my advice, just buy one =). If you are like me and like to do it yourself below is a how to tutorial for this pillow. Feel free to use your own colors and style if you want to mix it up a bit.

What you'll need for this project:
1yrd felt fabric
Ruler
Scissors
Sewing Machine
Tread to match fabric
needle
3" & 2" circles
stick pins
Pillow insert

So lets get started. At this point you should have all the materials necessary to make this pillow. Start by measuring your pillow so you can cut your fabric to fit. My Pillow is 16"x16" so i cut out two 17"x17" panels of felt for the exterior of the pillow. Allowing a 1/2" seam to sew the pieces together.
Next I used my 3" and 2" circles to draw the petal templates onto the felt. For this pillow I used about 12, 3" circles and 10,  2" circles. The bigger the flower the more petals you will need.

Cut them out

Then you want to cut them in half.

I like to lay the petals out to get a feel of what the flower will look like before I get to the sewing machine. Quick tip: I like to put a small fold on the petals to give them more dimension, this will cause you to use a few more petals. So if you want to do it that way don't throw away your scraps just yet you can make a few more petals from it. 

On to the fun part. Now that you have figured out what you want your pillow to look like it's time to get to sewing. Lay the petals out one layer at a time. Pinning them down to the exterior piece of fabric. 

Sew each layer until you get to the center. If you don't have a sewing machine hand stitching works as well. Quick Tip: when sewing the petals, the closer to the center you get the harder it is to get the fabric under the foot of the sewing machine. Try popping if off (the foot) and reattaching once you've gotten your needle in place.

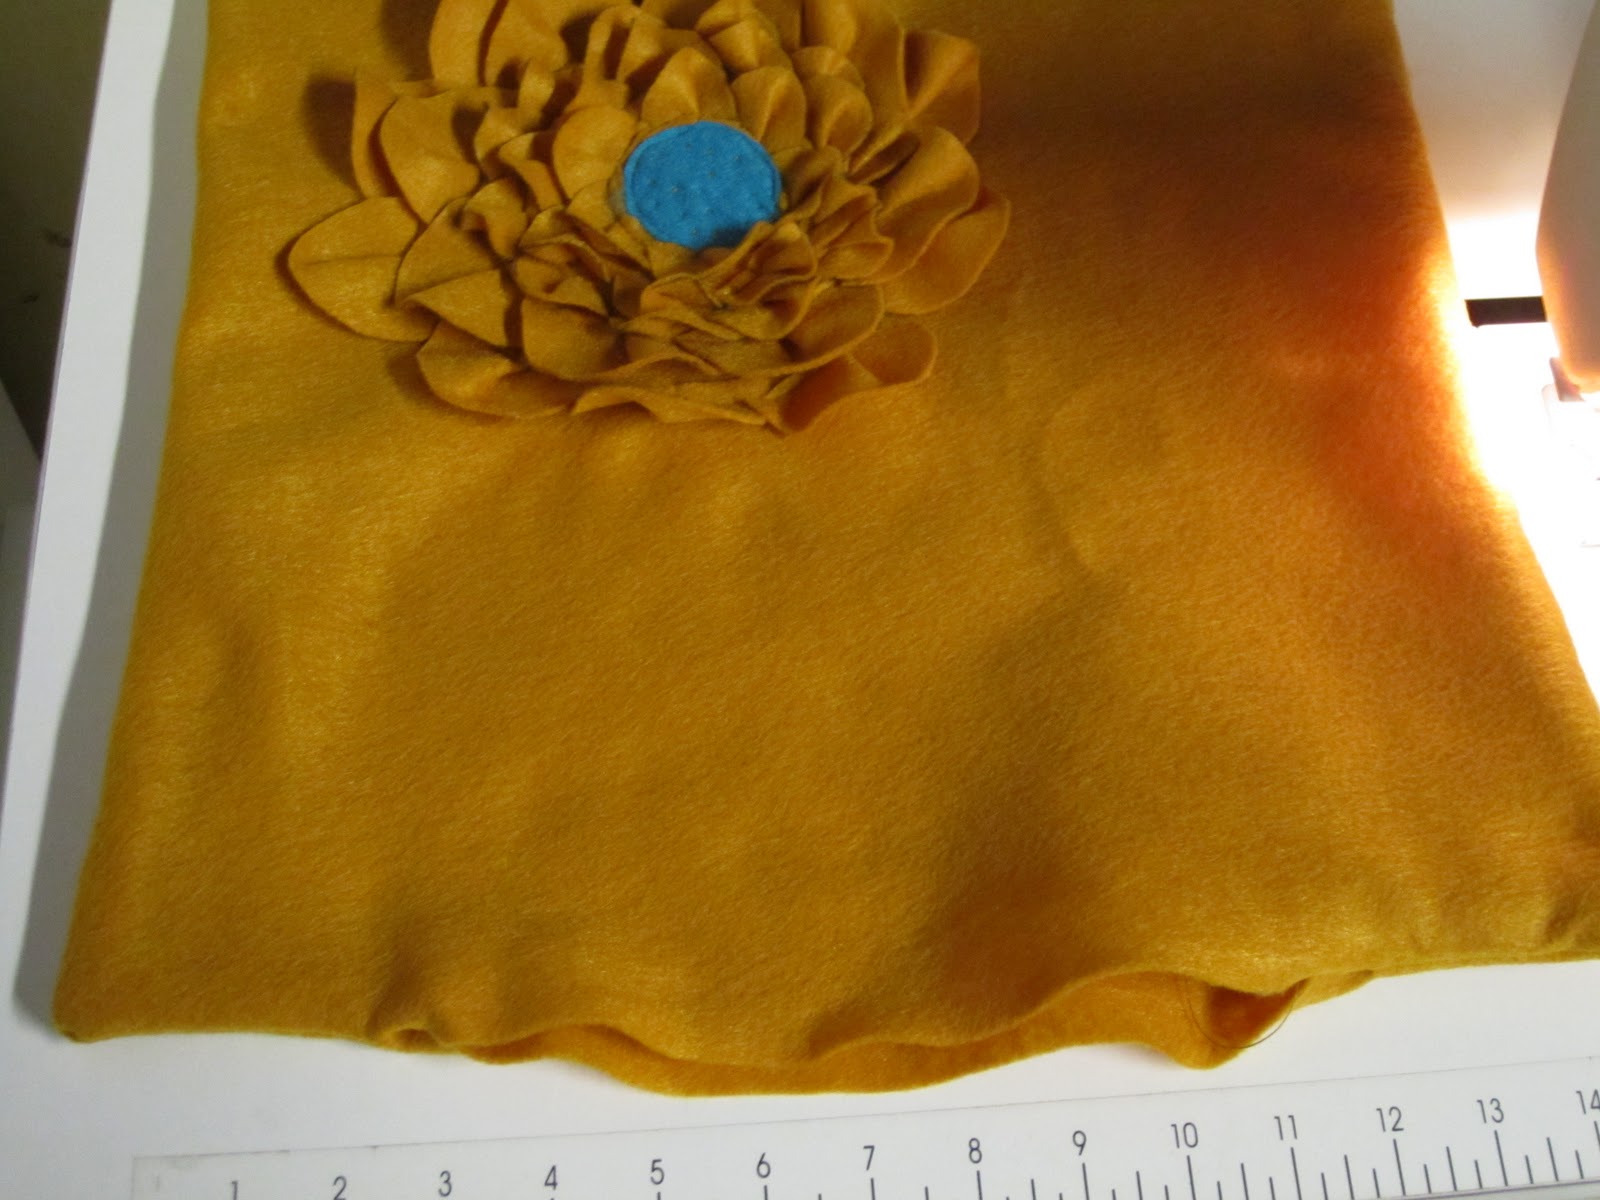
For the center I stitched a Blue Felt circle. Using the same tread I also stitched a few little dots in the center.

Next you want to sew the two fabric pieces you cut out earlier together to make the pillow. Be sure to line them up correctly. They should be sewn inside out. Leave a 4-5 inch opening at the bottom so you will be able to turn the pillow cover to its right side out.

I've learned that if you snip the edges right above the seam, when you turn the pillow right side out you get nice sharp pillow edges. Best Tip I've learned in years.

Flip the pillow covering right side out and it should look like this.

Hand stitch the bottom of the pillow to close it. Tuck the edges inside, pin it and sew and your done. Happy Crafting, hope y'all enjoyed making pillows with me.

Monday

Light it Up... Lighting Tips and Tricks.


Over the weekend a friend of mine asked me a question about lighting. Lighting can be tricky sometimes. So I thought I would give a few quick tips and tricks to help solve some lighting problems. I've run into a lot of lighting issues in my own home. For some reason when the house was built lighting was no on the top ten list of things to take care of. In order to have a good balance of light in a room you should try to illuminate at lease three corners of the room. The are three main types of lighting, ambient, task, and  accent lighting. Ambient lighting is what you would consider your general lighting source for the room. Task lighting is used to illuminate certain points in the room for a specific task. And Accent lighting is just that, a light that adds additional light to a space. It also can be used to enhance architectural elements or decorative accents. What I love the most about lighting is that you can mix and match it. A table lamp paired with a floor lamp, throw in a nice overhead light and you have a well lit room. Another tip that I picked up from the fabulous Jane Showers is eye level lighting is the best way to go. To much over head lighting makes us look bad, and we all want to look great when we walk passed a mirror in our homes. So Lamps, Lamps, Lamps, all over the place. 

Friday

Design Around That...... Tiger Blood


This is a painting that my father gave to my brother many moons ago. Currently it is hung in my mothers living room, which I would like to spruce up a little bit. Well the dilemma is my brother is not willing to part with the painting. With all the buzz around Charlie Sheen right now and his rant about running on "Tiger Blood" I thought why not keep it and work around it. I always knew my brother had tiger blood running through his veins. So now my wheels are turning, and the creative juices are flowing. I leaning towards an African tribal theme. It's a timeless design theme and I think it just might work. I did a post not to long ago, African Influence that really sparked an interest in tribal patterns and natural elements. This will be my first attempt at this type of design scheme, and I'm excited to see what I come up with. I will keep y'all posted though out the process. 

Thursday

Design Bloggers Conference..... Recap.


Myself along with Grace Bonney of Design Sponge

From left to right:
Deirdra Govan of Equilibrium Designs, Irene Lovett of Design Stiles,
and Raynee Crowe of Color Vision
These ladies were the BEST I swear.

Sold Out Event.

The four of us enjoying the Cocktails at the end of a productive day.

Also got to attend a launch party that Traditional Magazine was giving. It was like being surrounded by design Royalty.

Work hard, Play harder.

For the last few weeks I've been talking to anyone who would listen to me about this design bloggers conference that I was attending. Well folks it took place earlier this week and it was simply amazing. I'm still over excited about the knowledge I've gained, the people I met, the food I ate, and the Wine I drank. If you know me you know I'm in the early stages of being a wino, just so happens that the host of this spectacular event Adam Japko is a huge wino. Needless to say I felt right at home. This event was well worth every pretty pennie I spent on it. As a new blogger you always dream of meeting the authors of the blogs you follow. They are almost like the celebrity you can't get close too. This event allowed me to rub shoulders with bloggers that I have followed for years. Being able to pick the brains of people that inspire you on a daily basis was just mind blowing. Even more mind blowing to find out they started out just like you. Sometimes when your sitting in front of a computer at 2 a.m. it tends to feel like your by yourself out here. What a relief to have meet other bloggers who are as new as I am, and have the same drive to be as good as I aspire to be. This conference was the first of it's kind, and I truly feel as though I have been apart of something that is going to be big. I can't wait to sit down and comb though my notes with a fine tooth comb, and put into action all the tips and tricks that I've learned. FYI I have already created a budget for next years conference, where ever it will be held.

Tuesday

Design Bloggers Conference..... Day 2!!!!!!!!!


It's day 2, and I'm still excited. Day 1 was packed with so much great information, great speakers, and great people. Let me just tell y'all we were served champagne at 10am in the morning, OMG I loved it. Stay tuned for a recap of the entire conference.