So I made the pretty little pillow last night that I will have for sale in my Etsy shop soon enough. I thought It would be a good idea to show you all how to make one as well. Don't worry if your not the DIY type but you like to pillow my advice, just buy one =). If you are like me and like to do it yourself below is a how to tutorial for this pillow. Feel free to use your own colors and style if you want to mix it up a bit.
What you'll need for this project:
1yrd felt fabric
Ruler
Scissors
Sewing Machine
Tread to match fabric
needle
3" & 2" circles
stick pins
Pillow insert
So lets get started. At this point you should have all the materials necessary to make this pillow. Start by measuring your pillow so you can cut your fabric to fit. My Pillow is 16"x16" so i cut out two 17"x17" panels of felt for the exterior of the pillow. Allowing a 1/2" seam to sew the pieces together.
Next I used my 3" and 2" circles to draw the petal templates onto the felt. For this pillow I used about 12, 3" circles and 10, 2" circles. The bigger the flower the more petals you will need.
Cut them out
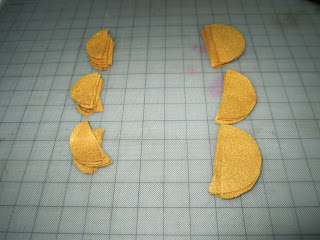
Then you want to cut them in half.
I like to lay the petals out to get a feel of what the flower will look like before I get to the sewing machine. Quick tip: I like to put a small fold on the petals to give them more dimension, this will cause you to use a few more petals. So if you want to do it that way don't throw away your scraps just yet you can make a few more petals from it.
On to the fun part. Now that you have figured out what you want your pillow to look like it's time to get to sewing. Lay the petals out one layer at a time. Pinning them down to the exterior piece of fabric.
Sew each layer until you get to the center. If you don't have a sewing machine hand stitching works as well. Quick Tip: when sewing the petals, the closer to the center you get the harder it is to get the fabric under the foot of the sewing machine. Try popping if off (the foot) and reattaching once you've gotten your needle in place.
For the center I stitched a Blue Felt circle. Using the same tread I also stitched a few little dots in the center.
Next you want to sew the two fabric pieces you cut out earlier together to make the pillow. Be sure to line them up correctly. They should be sewn inside out. Leave a 4-5 inch opening at the bottom so you will be able to turn the pillow cover to its right side out.
I've learned that if you snip the edges right above the seam, when you turn the pillow right side out you get nice sharp pillow edges. Best Tip I've learned in years.
Flip the pillow covering right side out and it should look like this.
Hand stitch the bottom of the pillow to close it. Tuck the edges inside, pin it and sew and your done. Happy Crafting, hope y'all enjoyed making pillows with me.


No comments:
Post a Comment